What Happened
JavaScript becomes useful when a web page can respond to something a person does. A visitor clicks a button, types into a field, selects an option, or submits a form, and the page changes without requiring a full reload. If you are learning frontend development, event handling is the bridge between a static page and an interface that feels alive.
This guide explains the beginner ideas behind events, listeners, functions, and the DOM. You will see how to turn one button click into a small, testable project, how to choose the right event for a task, and how to diagnose the mistakes that make a page appear unresponsive. The goal is not to memorize a large JavaScript library. It is to understand one repeatable pattern you can use this week.
An event is a signal that something happened in the browser. A click event means a pointer or keyboard action activated an element. An input event means the value of a field changed. A submit event means a form was sent. The browser creates these signals for you, but your code decides whether the page should react.
The first important separation is between the event and the response. The event is the trigger. The response is the work your function performs. For example, “the button was clicked” is the event, while “change the message and increase the count” is the response. Keeping those ideas separate makes your code easier to read and troubleshoot.
The browser represents the current page as a document object model, commonly called the DOM. Each heading, paragraph, button, and input becomes an object that JavaScript can find and update. When your script selects a paragraph and changes its text, you are asking the browser to redraw part of the page using the DOM.
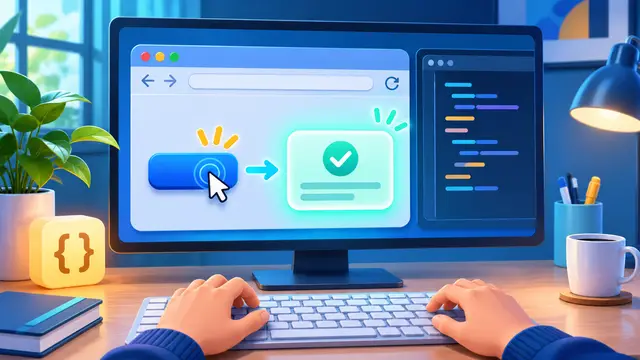
For a first exercise, imagine a small study tracker. It has a heading, a sentence that says how many practice sessions are complete, and a button labeled “Complete a session.” The page can begin as plain HTML. JavaScript adds the behavior by finding the button, listening for a click, and changing the sentence after every click.
That simple example teaches a complete interaction loop:
- A person performs an action.
- The browser creates an event.
- A listener notices the event.
- A function runs in response.
- The function updates page state or visible content.
This loop appears everywhere in frontend work. A navigation menu opens, a filter hides cards, a form displays a validation message, and a shopping cart updates a quantity through the same basic relationship between trigger and response.
The most common beginner pattern is an event listener. You select an element, call its event-listening method, name the event, and provide a function to run. In plain language, the instruction says, “When this element receives this kind of event, run this block of code.”
The function does not need to be complicated. It might update text, add a CSS class, remove a class, disable a button, or store a new value in a variable. Start with one visible change. If you add five behaviors before testing the first one, you make it harder to tell which part failed.
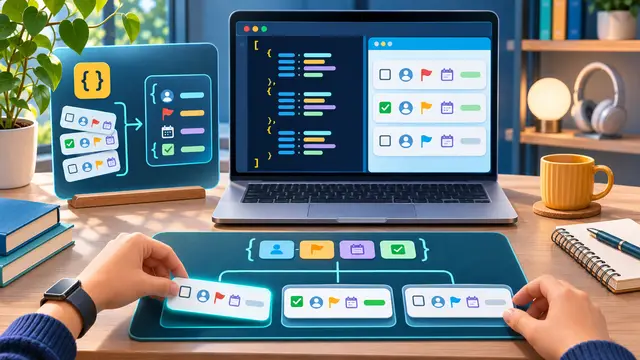
Another useful idea is state. State is information your page needs to remember while the visitor interacts with it. In the study tracker, the completed-session count is state. Each click changes that value, and the page displays the new result. You do not need a framework to understand this concept. A variable and a small update function are enough for a first project.
Keyboard access matters even in a beginner project. A real button can usually be reached with the keyboard and activated with the Enter or Space key. That is one reason to use a semantic button element instead of making a generic container pretend to be a button. Good event handling begins with a usable HTML element, not just a clever JavaScript trick.
When an interaction fails, check the chain in order:
- Does the selector find the element you intended to use?
- Does the script load after the page has the element available?
- Does the event name match the action?
- Does the listener run the function you expect?
- Does the function update the correct DOM element?
- Does the browser console show an error?
This checklist turns “nothing happens” into several smaller questions. That is a valuable coding habit because debugging is usually a process of locating the broken link rather than guessing at the entire program.
Why It Matters for Businesses
For a business, a static page can explain an offer, but a responsive page can help a visitor complete a task. An event-driven interface might reveal the next step in a course, validate a request before submission, calculate a simple estimate, or filter a set of resources. These moments reduce confusion because the page responds close to where the user made a decision.
Small companies often need practical improvements more than elaborate software. A team member who understands basic JavaScript events can make a course landing page show an answer after a learner chooses a skill level. They can add a “show details” interaction to a service comparison, or build a simple intake form that points out missing information before someone sends it.
The benefit is not only visual polish. Event handling helps teams think clearly about the user journey. Before writing code, you can describe the interaction in ordinary language:
- When the learner selects a path, show the recommended next step.
- When the visitor enters an incomplete email, show a useful reminder.
- When the person opens a question, reveal the explanation without moving them away.
- When the user finishes a practice task, mark that task as complete.
These statements are small requirements. They give a beginner something concrete to implement and give a reviewer something concrete to test. A short course can use this approach to connect coding vocabulary with a visible result instead of treating JavaScript as a list of abstract rules.
Event skills also improve communication between nontechnical teammates and developers. Someone who can describe the trigger, the expected response, and the information that changes is better prepared to write a request, review a prototype, or spot an edge case. That does not mean every employee must become a professional developer. It means basic technical literacy makes everyday project conversations more precise.
There is a direct connection to accessibility and trust. If a message appears only after a click, the interface should make that change understandable to people using keyboards, screen readers, or small screens. If a form rejects an entry, the page should explain what needs attention rather than silently blocking progress. Learning events gives you the foundation to notice these details early.
A useful business learning exercise is to pick one repeated question from a real website and turn it into a controlled interaction. The question might be “Which course is right for me?” or “What information should I include in a request?” Use fictional sample content while practicing. Define the trigger, the visible response, and the completion condition before touching the code.
That exercise also builds confidence for working adults. A busy professional does not need to build a full application to benefit from JavaScript. Completing one working interaction proves that the learner can connect HTML structure, a selector, a function, and a user action. The project becomes a small piece of portfolio evidence and a practical way to understand what frontend courses teach.
When teams learn these fundamentals in plain language, they can make better decisions about when a small page change is enough and when a larger tool is needed. That judgment saves time. It also helps a business avoid buying a complicated solution for a problem that could be clarified with a simple, well-tested interface.
The Practical Automation Opportunity
Event handling is a building block for automation because it teaches you to identify a trigger and define the next action. In a browser, the trigger may be a click. In a no-code platform, it may be a new form response. In an AI workflow, it may be a request that needs classification. The tools differ, but the thinking pattern is similar: something changes, a rule runs, and a useful result follows.
Start with a small browser project that has one piece of state. Create a study-session button, a reading-list counter, or a “reveal answer” card. Then work through these steps:
- Write the user action in one sentence.
- Choose a semantic HTML element that supports the action.
- Give the element a clear selector.
- Write the smallest function that creates a visible response.
- Test the interaction with a mouse and a keyboard.
- Use the browser console to inspect errors and values.
- Add one edge case, such as a second click or an empty input.
The point of the project is not to produce a polished product. It is to practice the complete loop from requirement to test. If the button increments a count, decide whether the count should start at zero, whether it can be reset, and what should happen after ten clicks. Those questions teach you to think about behavior instead of only appearance.
You can extend the project without making it overwhelming. Add a reset button that returns the count to zero. Add a status message that changes when the learner completes three sessions. Add a CSS class that gives completed items a different visual treatment. Each addition creates another opportunity to practice selecting an element, changing state, and checking the result.
The same progression works for a workplace workflow. Consider a fictional request form for a small training business. A visitor selects AI, coding, or cybersecurity. The page responds with a short description and a suggested beginner activity. The selection event becomes the trigger, the recommendation becomes the response, and the chosen lane becomes the state. You have created a learning aid without needing a database or a complex framework.
As you practice, keep human judgment in the loop. JavaScript can show a reminder, calculate a value, or organize choices, but it does not know whether a business rule is correct. A form that blocks a valid request is a process problem, not only a coding bug. Ask a real person to test the interaction and describe what they expected to happen.
Common first-project mistakes are useful lessons:
- Attaching the listener to the wrong element because the selector name is misspelled.
- Using an event name that does not match the user action.
- Replacing all page content when only one message needed to change.
- Forgetting that a value from an input usually arrives as text.
- Testing only one click and missing what happens on repeated actions.
- Ignoring keyboard use because the mouse test passed.
- Adding a framework before understanding the plain JavaScript version.
You can use browser developer tools as a learning partner. Inspect the selected element to confirm that the class or identifier exists. Add a temporary console message inside the function to prove whether it runs. Watch the value of your counter after each action. Remove the temporary messages after the behavior is understood. This is a calm, evidence-based way to debug instead of rewriting the whole file.
A short self-paced course can organize these exercises into a useful path. First, learn basic variables and functions. Next, practice selecting DOM elements. Then connect listeners to clicks, input changes, and form submissions. Finally, build a small project that combines the pieces. The order matters because each lesson answers a problem that appears in the next one.
Do not measure progress by how many code snippets you can copy. Measure it by whether you can explain the interaction in your own words, predict what should happen, and locate the first broken step when it does not. That kind of understanding transfers to React components, no-code automation builders, and AI-assisted coding because you still need to define the user action and verify the result.
For a practical assignment, build a three-question course selector using fictional questions. Each answer should update a recommendation area. Keep the content simple and the decision rules visible. Test an answer change, a repeated selection, a keyboard interaction, and a refresh. Then write down one improvement you would make if the project were used by real learners.
This assignment produces several useful artifacts: a working page, a short explanation of the event flow, a test checklist, and a list of next improvements. Together, they show more than a screenshot. They show that you can connect a user need to a small technical solution and evaluate whether the result behaves as intended.
Business Takeaway
JavaScript event handling is a small skill with a wide reach. It teaches you how a browser notices action, how a function responds, how the DOM changes, and how testing turns a vague failure into a specific question. Those are the same habits that support larger frontend projects and practical automation workflows.
If you are new to coding, start with one button and one visible response. Build a study-session counter or a course-choice message using fictional content. Test it with a mouse and keyboard, inspect one browser-console message, and write down what you would improve next. That finished interaction is a realistic first step toward learning JavaScript with confidence this week.